DIAMONDS
Certs and Cutting
Navigation:
Diamond Certification
Anatomy of a Diamond
The Evolution Of Diamond Cutting
Unbiased, independent and completely yours; your diamond, proven.
What is a Diamond Certificate?
Before the purchase of your certified diamond, you should review a copy of its certificate as proof that it has undergone an unbiased, professional examination from an independent laboratory.
Why Does It Need A Certificate?
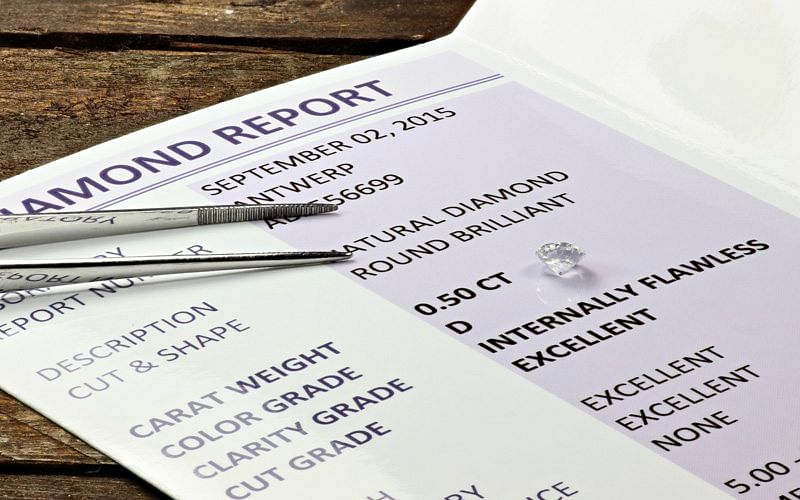
A diamond certificate, also called as a diamond grading report or diamond dossier is an evaluation created by a team of trained professionals. The diamond is measured, examined and inspected closely. This is achieved using a jeweller’s loupe, a microscope, and other industry tools. A diligent certificate includes an analysis of your diamond’s dimensions, clarity, colour, polish, symmetry, and other characteristics. Many round diamonds will also include a cut grade on the report. Some diamonds are laser engraved with a serial number on the girdle, this number matches the serial number of the certificate. This all gives you proof that your diamond, is truly yours and completely unique.
Who Issues The Diamond Certification?
Several well-known international grading agencies have high reputations, however, some bodies are much stricter than others. Each entity grades and describes diamonds differently. It is important to remember that not all reports are created equal and the cost of the diamond is not comparable across the different certification bodies. Today most diamonds above 0.20ct in weight are certified by one of the below bodies.
- Gemological Institute of America (GIA)
- American Gemological Society (AGS)
- Diamond High Council (HRD, which is an abbreviation of the Dutch “Hoge Raad voor Diamant”)
- International Gemological Institute (IGI)
- European Gemological Laboratory (EGL)
If you want to talk to anyone regarding your diamond certificate, please do not hesitate in contacting one of our diamond experts today on; +44(0)2081440035 or email info@durhamrose.com
“Diamond Certification: What does each term on a diamond certificate mean? Learn more with our diamond education essentials.”
→ Return to Top
Understanding your diamond allows you to understand its unique characteristics, beauty and true value
What Is Diamond Anatomy?
When purchasing a diamond it is helpful to have an understanding of a diamonds anatomy to truly appreciate diamonds and all of their intricacies. It is important that you consider the most important components which bring the diamond to life: the diameter, table, and depth. These components figure prominently into determining the diamonds cut grade.
When people think of “cut,” they often think of the shape of a diamond rather than its actual cut quality. Cut reflects the diamond’s fire, sparkle, and brightness, and as a value factor, it refers to a diamond’s proportions, symmetry and polish which are also known as the fourth ‘C’. While understanding a diamond’s anatomy can be beneficial, it should not supersede the importance of or be confused with cut grade.
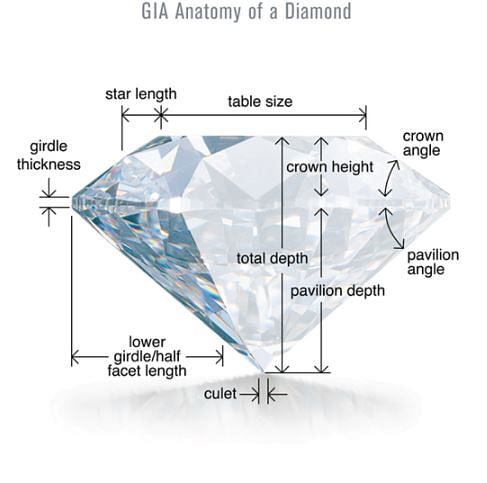
The diagram below visually labels all of the major parts of a diamond; its ‘anatomy’.
What Does It All Mean?
We want to share and extend your diamond knowledge so that when we come to creating your forever piece, you have been given all the knowledge you desire.
Diameter: The width of the diamond as measured through the girdle.
Table: The largest polished facet located on the top of the diamond
Crown: The top portion of a diamond extending from the girdle to the table. The crown is made up of bezel facets (crown mains), star facets, upper girdle facets (upper halves), and a table facet.
Girdle: The small vertical plane around the perimeter of the diamond. It can vary in thickness and can be faceted, polished or unpolished. Durham Rose recommends avoiding girdles either extremely thin as this can make the diamond more susceptible to chipping or extremely thick as this can make the diamond carry a lot of weight around the belly of the stone. This can cause the diamond to look smaller if compared to others with a similar weight.
Pavilion: The bottom portion of a diamond, extending from the girdle to the culet.
Culet: The tip of the pavilion. It can be pointed or have an additional facet varying in size from very small to large.
Depth: The total height of a diamond measured from the culet to the table.
→ Return to Top
The Evolution Of Diamond Cutting
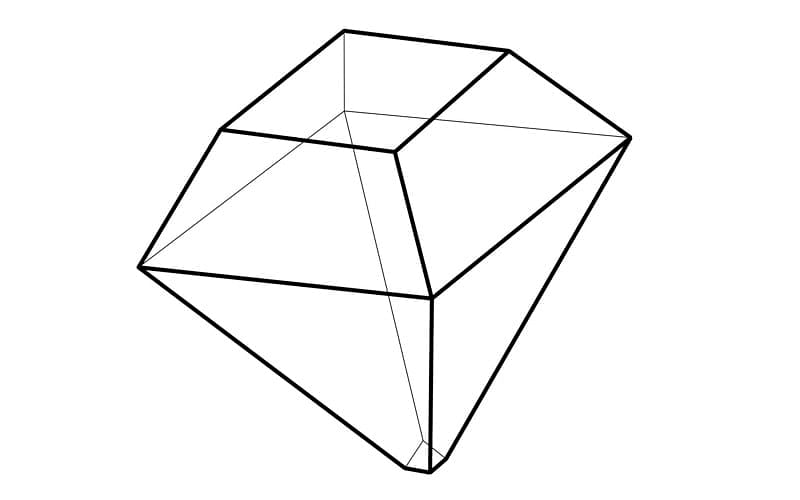
The evolution of the archetypal ‘round brilliant cut’ as we know it today, starts with the basic form of a rough diamond- the octahedron. As diamonds are the hardest material on earth, it was only in the 13th century that it was realised that diamonds could be cleaved or cut to improve the optical effect that we have come to know so well now.
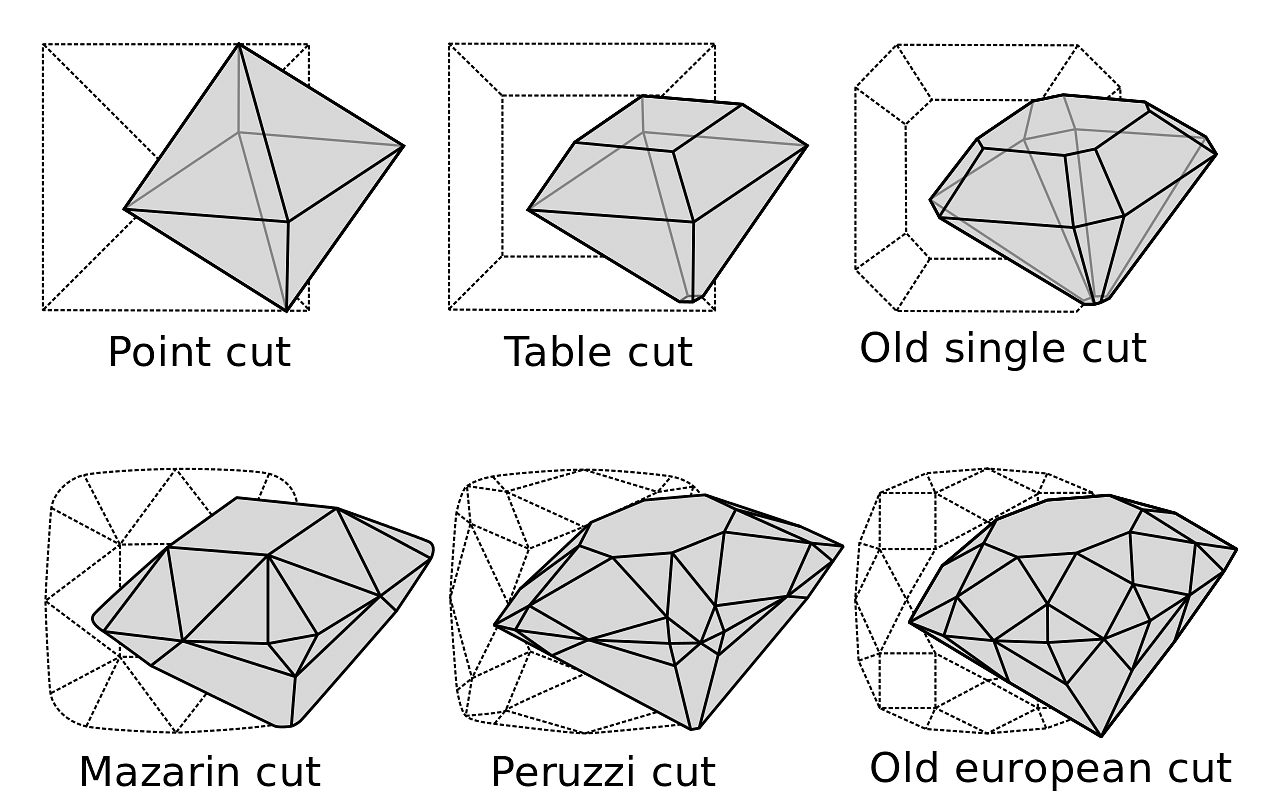
The first cut that we know of was called the ‘point cut’, which is where the flat surfaces at slight angles to the natural octahedron crystal were polished.
The Beginning of ‘Brilliant’
In the 1400’s, the ‘table cut’ was developed where the top of the octahedral crystal was cleaved away, in doing so leaving behind a large ‘table’ facet at the top. It wasn’t until the 15th century when a cutting wheel was being used to technically improve the facted cuts. New facets were being cut to optically enhance the table cut.
From having this tool, the ‘single cut’ was born in the 16th century, which was the first main predecessor of the modern round brilliant cut. This diamond cut had 18 facets, including the flat culet at the bottom. Which was a major upgrade on the ‘table cut’ having a multi-cornered table. This cut is still used now for accent stones which are too small to have the full brilliant cut. This then transformed over time into various cuts named after their inventors who realised that by adding facets they could increase the optical effect and light performance.
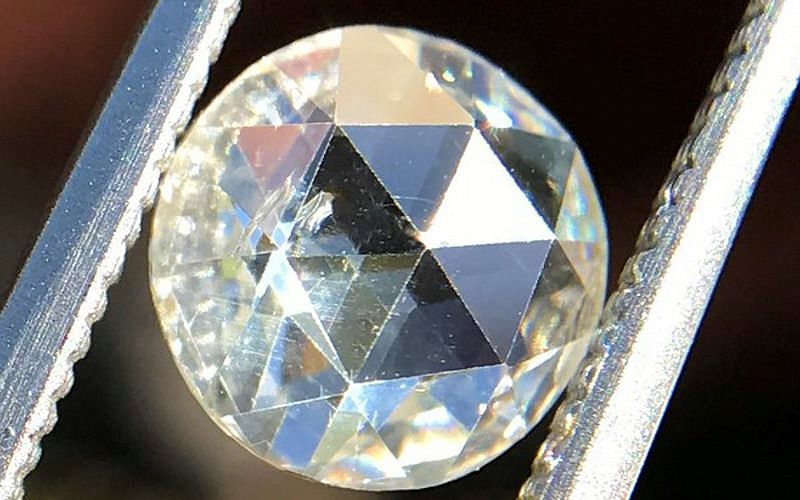
Georgian Rose
Towards the end of the 18th century, during the Georgian period, the rose cut was developed. This is a diamond cut with a flat base and facets that rise up to meet at a point in the centre. These can either have six facets or like older stones have a less structured look which generally at the time could be any shape, generally not round. If they are round they will be more modern cuts, cut with modern tools.
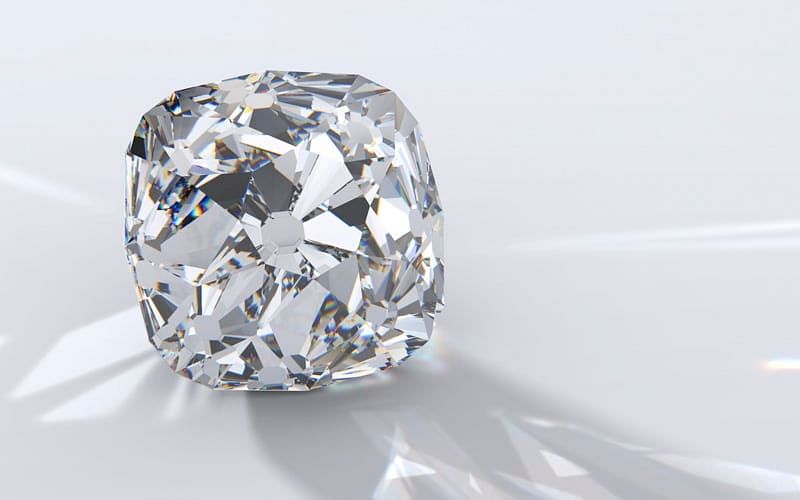
Victorian Mines
Around the same time, the single cut was advanced into the most used cut throughout Georgian and Victorian jewellery, the ‘Old Mine Cut’. This was still cut by hand on the polishing wheel, all faceted by eye. This made every single stone unique with no strict angles, you could go so far as to say each stone had its own personality. The shape follows the natural shape of the octahedron with a square outline to retain as much weight from the rough stone (the modern cushion cut is the closest example to this antique stone.) The ‘Old Mine Cut’ had a small table and a large culet, which gives the cut a soft and glamorous feel, with long flashes of colour due to the larger facet sizes.
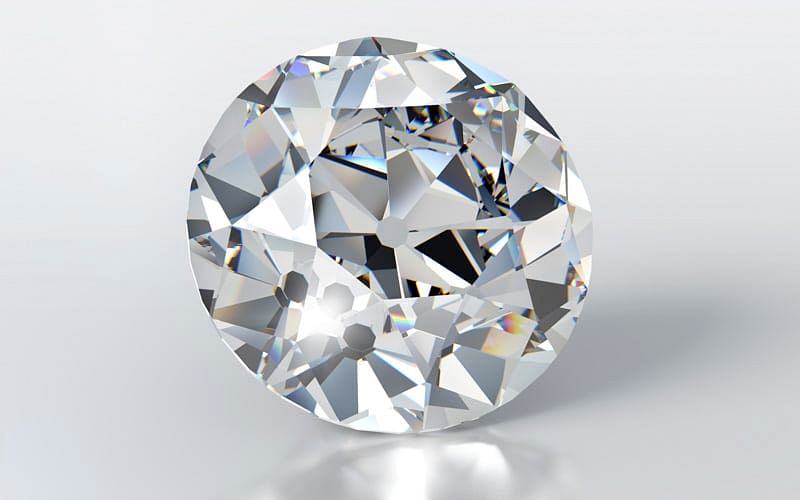
Old European Power
This evolved into the ‘Old European Cut’, when the steam and then power driven bruting machine was introduced. This made it possible to apply greater precision to round the shape of the stone to be less square; also to modify the cut slightly to improve scintillation (sparkle). The ‘Old European Cut’ is the closest stone to the modern round Brilliant cut. It has a round shape with a smaller table a higher crown and a flat culet. Like the ‘Old Mine Cut’, the facets were still cut by eye, so the facets are larger which shows longer flashes of colour rather than the short sharp flashes of the modern round brilliant. Some might say these stones are full of character as you will never see the same exact stone cut twice.
Brilliance, Achieved
The modern brilliant cut was first realised in 1919 by Tolkowsky, who through the use of Mathematics, developed the first ‘Ideal’ cut by working out the optimum angles of refraction. These brilliant cuts were so named from the outstanding scintillation and ‘brilliance’ that these modern cuts displayed.
→ Return to Top
